repotting7 min read
Time to Move Up: Everything You Need to Know About Repotting
When to do it, how to do it, and what to plant into.
Repotting is one of the most satisfying things you can do for a houseplant — and one of the most frequently delayed. A root-bound plant isn't immediately dying, but it is slowly running out of resources: soil volume, drainage capacity, and room to grow. Moving a plant into fresh soil and a slightly larger container can transform a struggling specimen into a vigorous grower within weeks. The key is knowing when the time is right and approaching it with a little confidence.
Signs Your Plant Needs Repotting
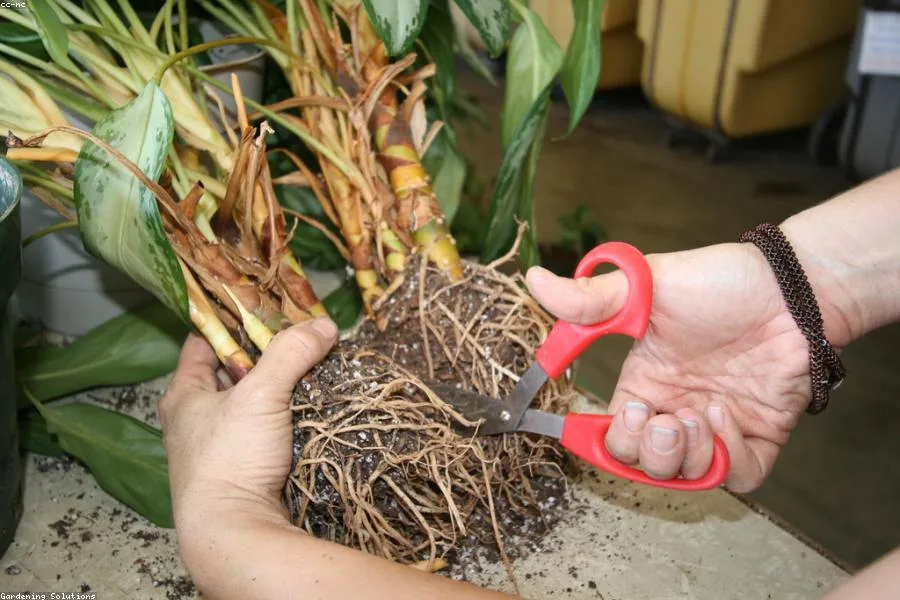
The clearest signal is roots: if you see them emerging from the drainage holes at the bottom of the pot, or circling densely around the surface of the soil, your plant is root-bound. Lift the plant out of its pot (this is easier than it sounds — tip it on its side, squeeze a plastic pot gently, and coax the root ball loose) and look at the root structure. A healthy plant ready for potting up has white or pale tan roots filling the pot but not completely displacing the soil. A severely root-bound plant will be a dense mat of roots with almost no soil visible.
Other signs: water that rushes straight through the pot without absorbing (the roots have displaced the soil), rapid drying even with regular watering, stunted growth during the growing season, or a plant that's visually too large for its container and has become unstable.
Pro tip
Spring is the best time to repot — plants are entering their active growth phase and recover quickly from root disturbance. Repotting in late fall or winter stresses a plant that's already slowing down.
Choosing the Right Pot
Always go up one pot size — that means 1–2 inches larger in diameter than the current pot. The instinct to give a plant 'room to grow' by jumping several sizes is understandable but counterproductive. Excess soil holds moisture that roots can't absorb quickly enough, leading to waterlogging and root rot. A slightly snug fit encourages healthy root development and appropriate soil moisture levels.
Drainage holes are non-negotiable for almost every houseplant. Without drainage, excess water has nowhere to go, and even the most careful watering will eventually lead to root rot. If you love a decorative pot without drainage holes, use it as a cache pot — plant into a plain nursery pot with drainage and set it inside the decorative outer pot.
Choosing the Right Soil
Not all plants want the same growing medium, and standard 'all-purpose potting mix' is a compromise that serves none particularly well. Tropical aroids — monsteras, pothos, philodendrons, anthuriums — thrive in a chunky, well-aerated mix: two parts standard potting mix, one part perlite or pumice, and one part orchid bark or coconut coir. This replicates the loose, organic debris of the forest floor they evolved on.
Succulents and cacti need fast-draining, gritty soil: equal parts potting mix and coarse horticultural sand or perlite. Ferns prefer moisture-retentive mixes rich in organic matter. Peace lilies and snake plants do well in standard potting mix with a little extra perlite for drainage.
Fresh potting soil comes with a small amount of fertilizer included — this is usually enough for the first 4–6 weeks after repotting, after which you can begin a regular feeding schedule.
Pro tip
Wet your potting mix slightly before repotting — damp soil holds together better and is easier to work with around the root ball. Bone-dry mix is dusty and difficult to pack around roots without air pockets.
The Repotting Process
Water your plant 24 hours before repotting — moist roots are more flexible and less prone to damage than dry ones. Prepare your new pot by adding a layer of fresh mix to the bottom. Remove the plant from its old pot, gently loosen the outer roots if they're tightly wound, and shake off as much of the old soil as you comfortably can without tearing roots.
Set the root ball in the new pot so the base of the stem sits at the same level as before — don't bury the stem deeper, as this can cause rot. Fill in around the root ball with fresh mix, pressing gently to eliminate large air pockets. Water thoroughly until it drains from the bottom, then place in bright indirect light and leave it alone for a week. Expect some temporary leaf droop while the plant adjusts — this is normal and should resolve within a few days.